From Init to Tag
This tutorial walks you through setting up sley in a new project, from initialization to your first version bump, git tag, and changelog. Follow the steps top to bottom.
Prerequisites:
- sley installed (Installation Guide)
- Git installed and configured
- A project directory (can be empty or existing)
Time: ~10 minutes
Step 1: Initialize Your Project
Create a project directory and initialize sley:
mkdir my-project && cd my-project
git init
sley init
An interactive TUI appears so you can select plugins:
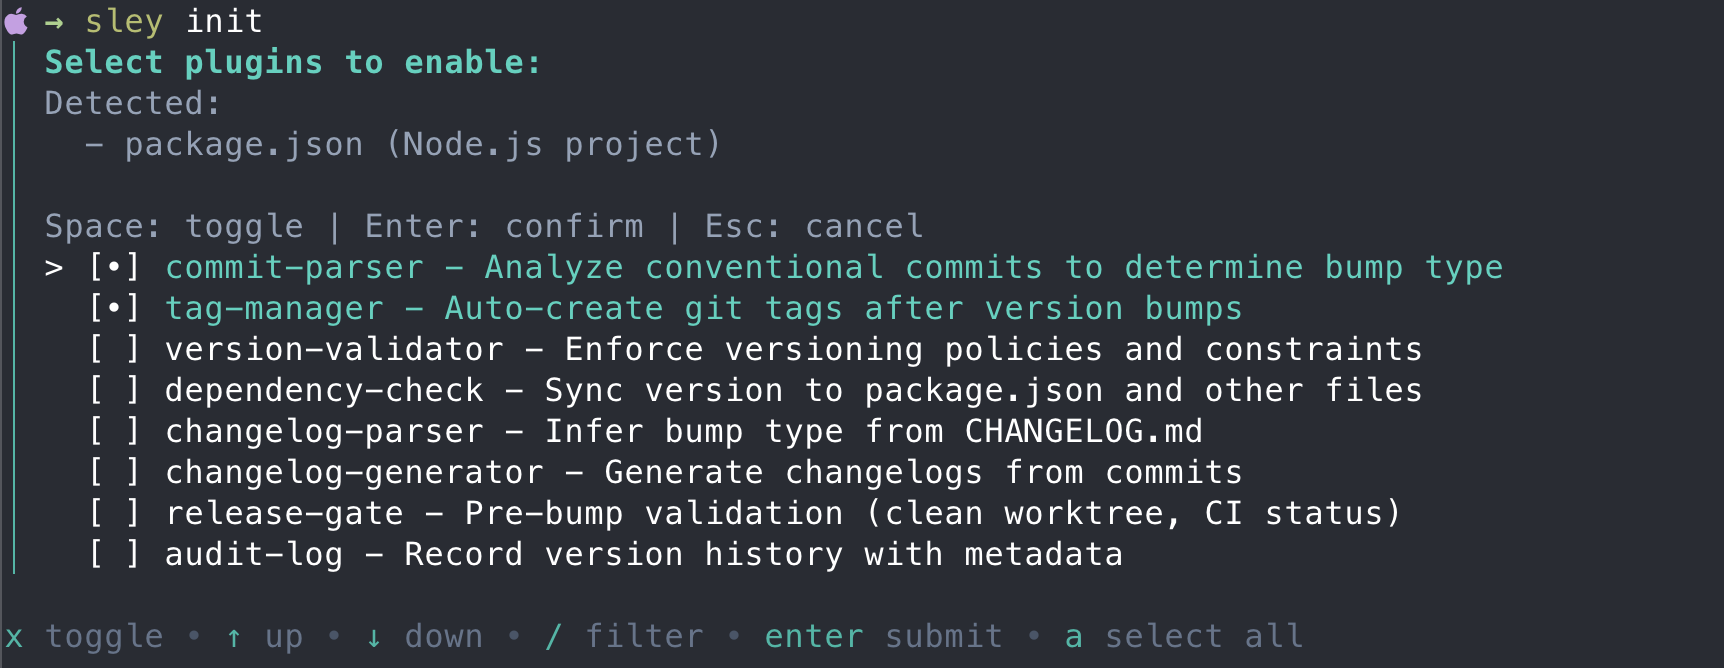
sley creates two files:
.version- contains your version number (default0.0.0).sley.yaml- plugin configuration
Non-interactive setup
sley init --yes skips the TUI and enables commit-parser and tag-manager with defaults.
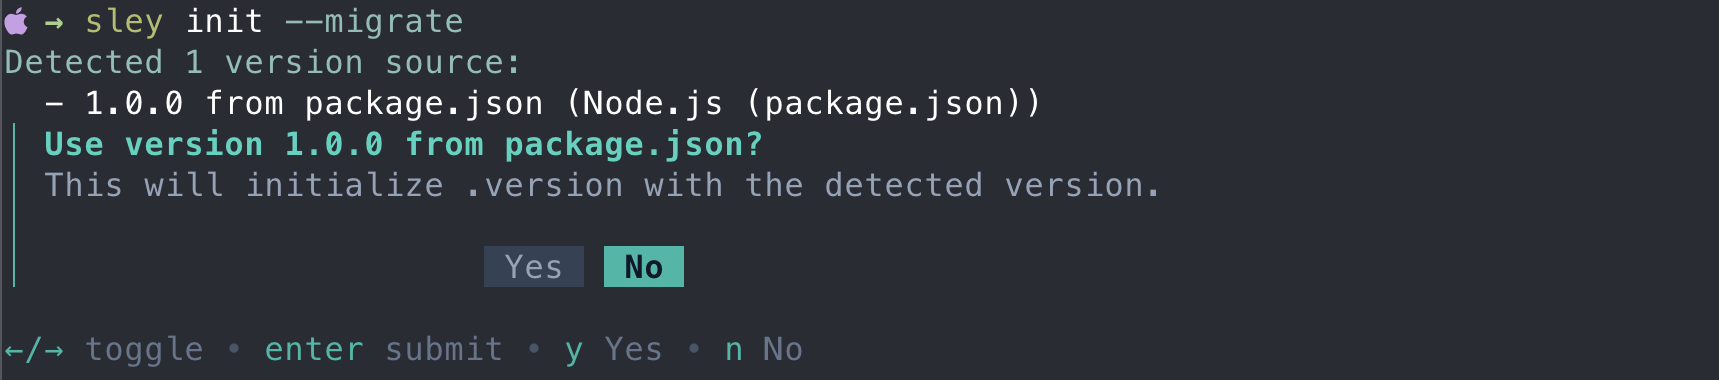
Migrating an existing project?
If your project already has a version in package.json, Cargo.toml, or a similar file, run sley init --migrate to detect and import it:
Step 2: Make Your First Commit
Add some content and commit using Conventional Commits format:
echo "# My Project" > README.md
git add .
git commit -m "feat: initial project setup"
The feat: prefix tells sley this commit introduces a new feature, which matters when using sley bump auto.
Step 3: Bump the Version
Bump the minor version to reflect the new feature:
sley bump minor
# Bumped version from 0.0.0 to 0.1.0

sley show
# 0.1.0
Bump types
| Command | Result | When to use |
|---|---|---|
sley bump patch | 0.1.0 → 0.1.1 | Bug fixes |
sley bump minor | 0.1.0 → 0.2.0 | New features (backwards compatible) |
sley bump major | 0.1.0 → 1.0.0 | Breaking changes |
sley bump auto | Inferred | Let commit history decide |
sley bump auto requires commit-parser to be enabled. It maps fix: → patch, feat: → minor, feat!: / BREAKING CHANGE: → major.
Auto-commit and tag on bump
If tag-manager has auto-create: true in .sley.yaml, sley bump automatically commits .version and creates the git tag. No manual git commit needed.
Step 4: Create a Git Tag
If tag-manager is enabled and auto-create is not set, create the tag manually:
sley tag create
# Created tag v0.1.0
To create and push in one command:
sley tag create --pushStep 5: Generate and Merge the Changelog
Enable changelog-generator in .sley.yaml:
plugins:
  commit-parser: true
  tag-manager:
    enabled: true
  changelog-generator:
    enabled: true
    mode: "versioned"
On the next bump, sley writes a versioned changelog to .changes/:
sley bump minor
# Bumped version from 0.1.0 to 0.2.0
# .changes/v0.2.0.md generated
When you are ready to consolidate all versioned changelogs into CHANGELOG.md:
sley changelog mergeSimplified Workflow
Once configured, the typical day-to-day workflow is:
# Commit work using conventional format
git commit -m "feat: add new feature"
git commit -m "fix: resolve bug"

# Bump version (auto-infers from commits)
sley bump auto

# Create and push tag
sley tag create --push

# Commit and push version file
git add .version .changes/
git commit -m "chore: release $(sley show)"
git push
What's Next?
- Usage Guide - all commands and options
- Pre-release Versions - alpha, beta, RC workflows
- CI/CD Integration - automate in GitHub Actions, GitLab CI
- Plugin System - configure plugins for your workflow
- Monorepo Support - multi-module version management
Troubleshooting
| Issue | Solution |
|---|---|
| "version file not found" | Run sley init to create .version |
| "invalid version format" | Ensure .version contains only X.Y.Z (no v prefix) |
| "tag already exists" | Bump to a new version or delete the existing tag |
| Commands not working | Run sley doctor to validate your setup |
See the Troubleshooting Guide for more help.